Squarespace Redirects & 404 Pages: Beginner’s Guide
Changing your Squarespace URL slugs can make your site more SEO-friendly. But here’s the catch: every time you change a slug, the old link breaks. Visitors clicking it will end up on a 404 error page.
That’s where redirects come in. Redirects tell browsers and search engines that a page has moved, making sure your traffic (and SEO value) isn’t lost.
In this guide, I’ll explain how 404s work, how to set up 301 redirects in Squarespace, and the important redirect rule most beginners overlook.
What Happens When You Change a Slug?
Let’s say you start with a page slug like /portfolio. Later, you decide to update it to /web-design-portfolio. Great for SEO — but now anyone trying to access /portfolio will land on a 404 page.
A 404 (page not found) won’t directly harm your Google ranking, but it can:
Create a poor user experience.
Cause you to lose traffic if people click old links.
Break links from social media, emails, or other websites.
That’s why redirects are so important.
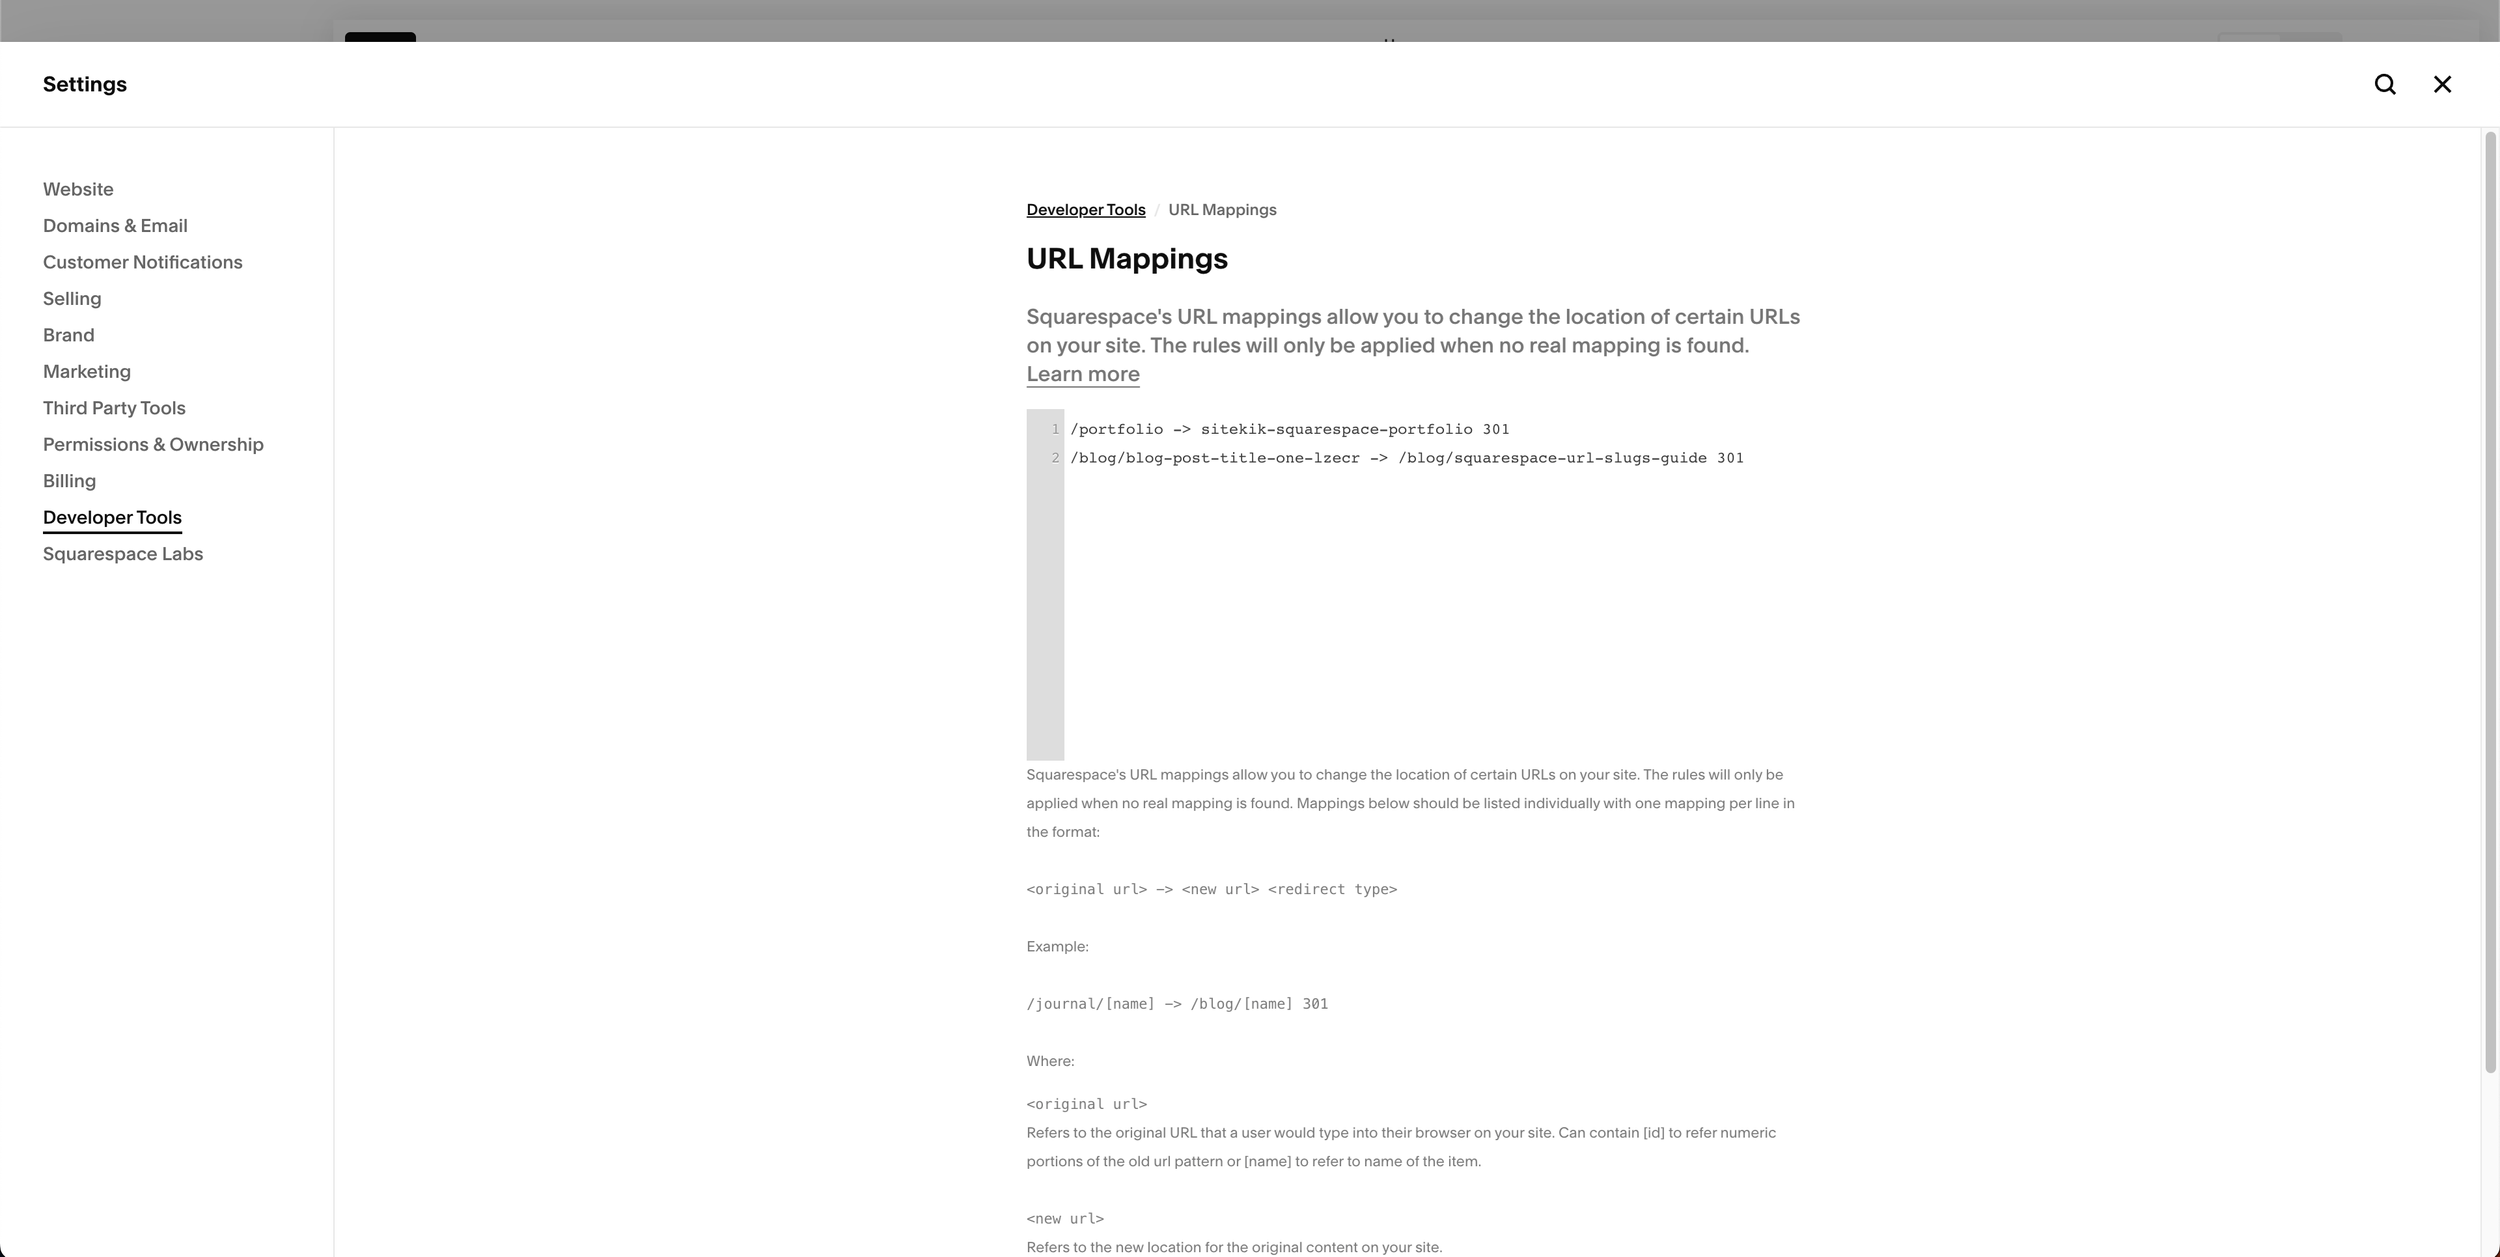
How to Set Up 301 Redirects in Squarespace
Squarespace makes it simple with URL Mapping:
Go to Settings → Advanced → URL Mappings.
Enter your redirect in this format:
/old-url -> /new-url 301
Save changes.
Example:
/portfolio -> /web-design-portfolio 301
The Redirect Rule You Should Never Forget
When you change slugs multiple times, always redirect from the original slug straight to the newest one — not from the middle version.
Example:
Start with /portfolio.
Change to /web-design-portfolio:
/portfolio -> /web-design-portfolio 301
Later change to /squarespace-portfolio.
❌ Wrong way (redirecting in a chain):
/web-design-portfolio -> /squarespace-portfolio 301
✅ Correct way (always map from the original):
/portfolio -> /squarespace-portfolio 301
Why?
It avoids redirect “hops.”
Keeps your redirects clean.
Makes sure Google and visitors always land on the right page.
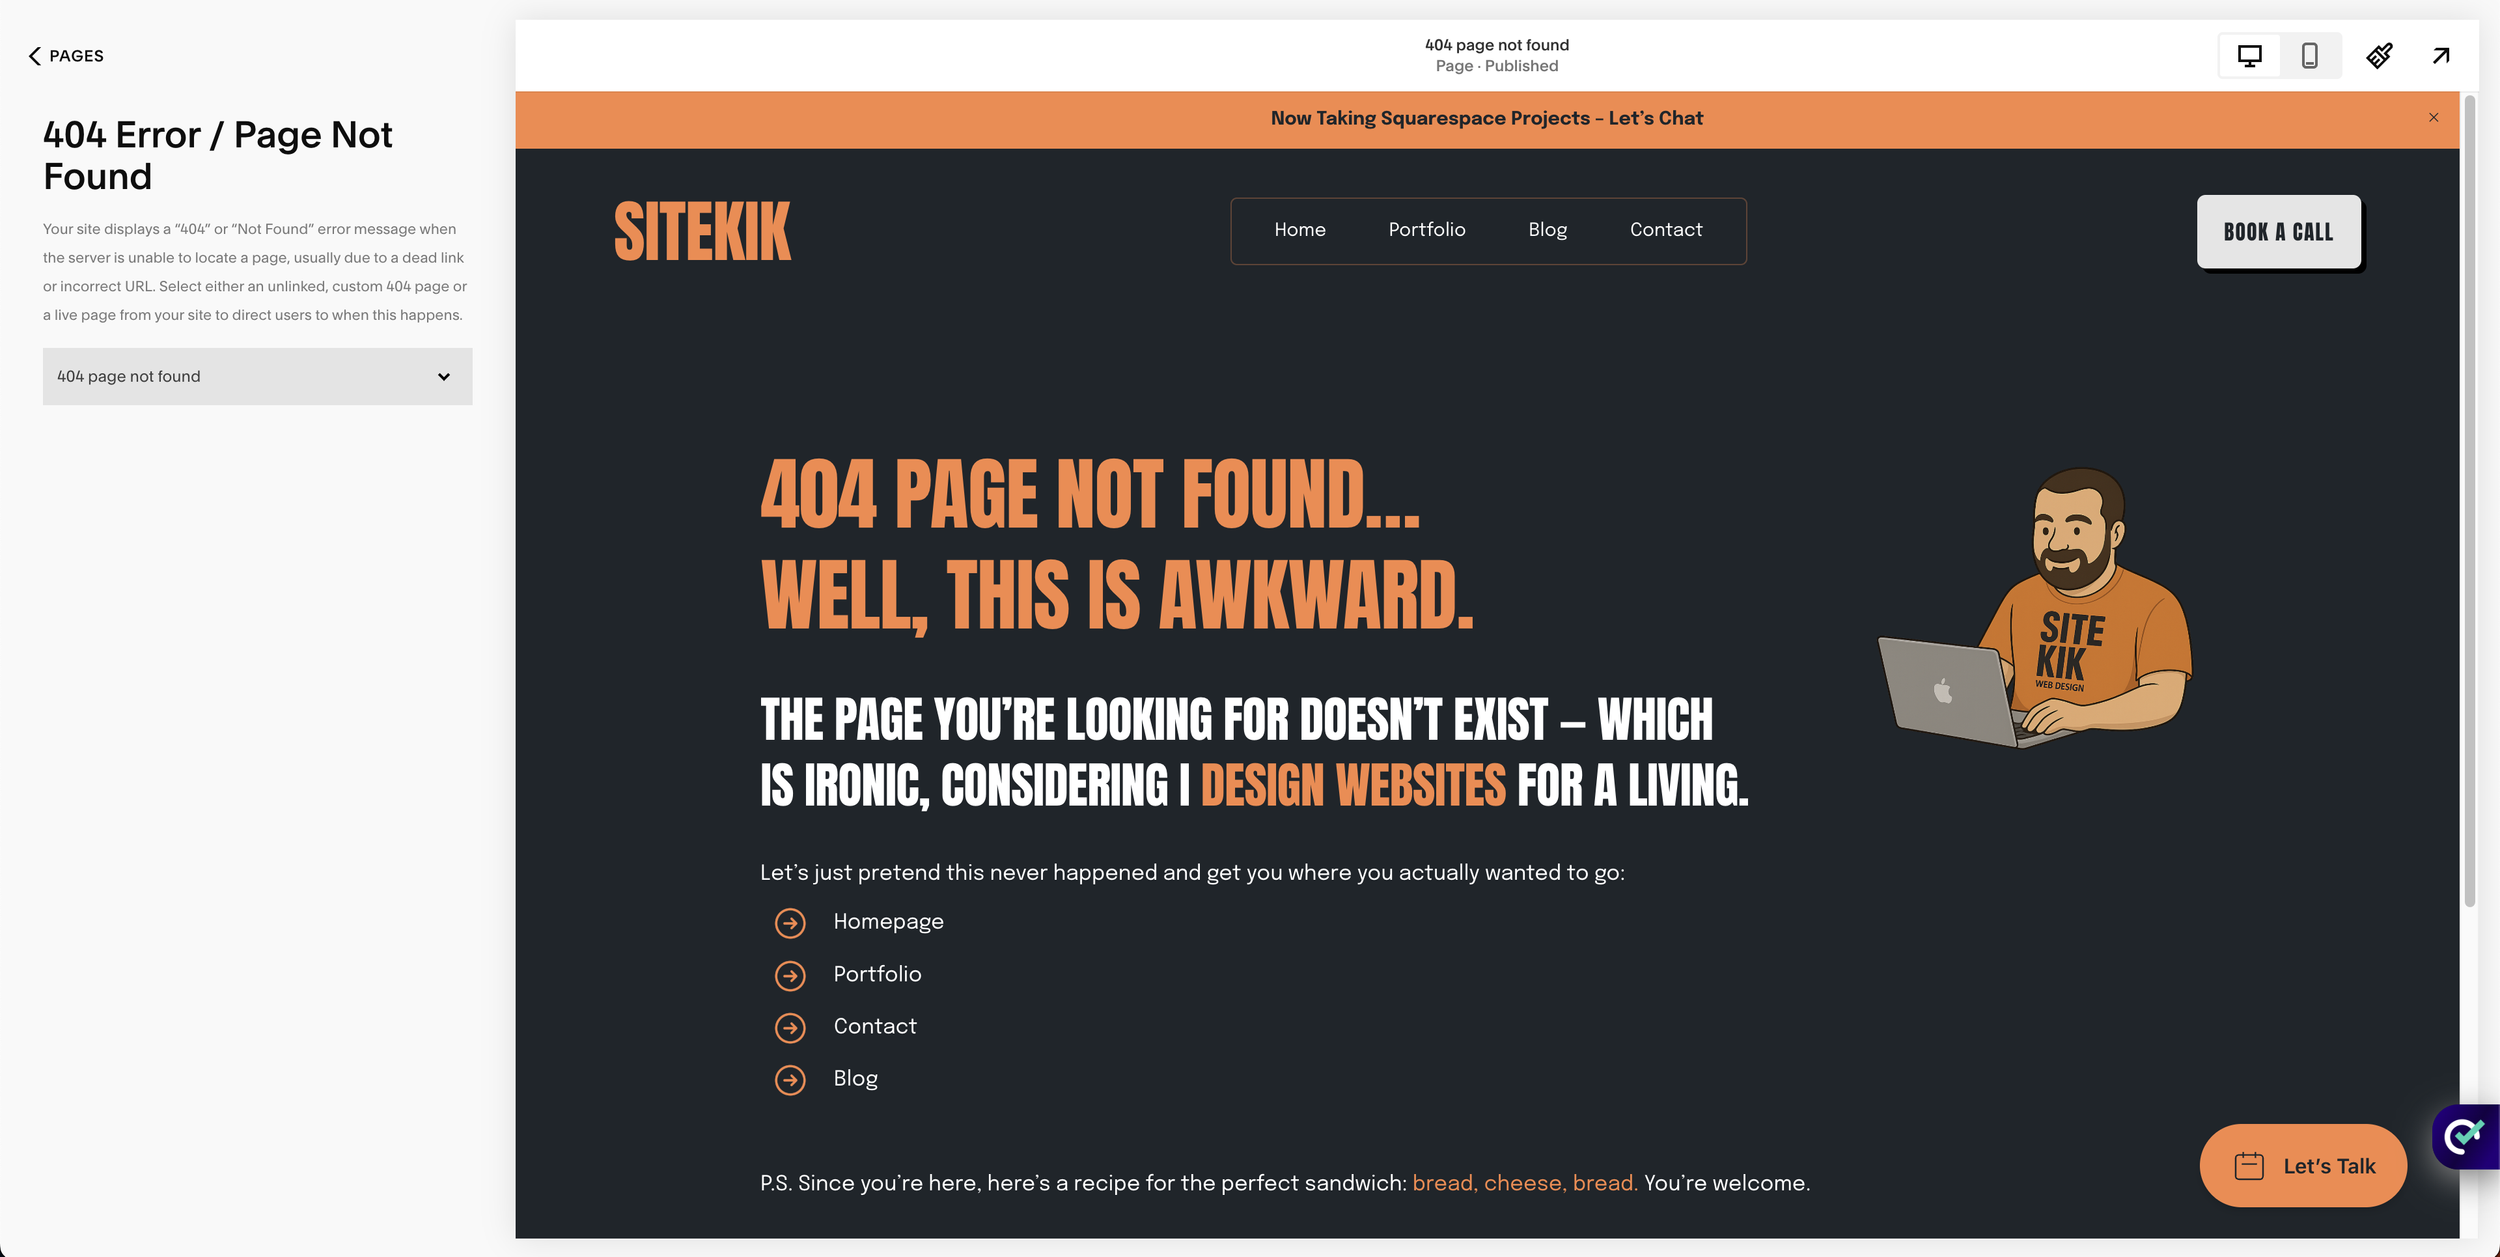
Creating a Helpful 404 Page
Even with redirects, 404s are unavoidable. Maybe you delete a page, or someone types in the wrong link. Instead of showing a bland “Page Not Found,” you can design a custom 404 page that:
Matches your site branding.
Explains the error in friendly language.
Links to your homepage or contact page.
To set this up:
Create a new page with your 404 design.
Add a short message (e.g., “Oops, this page doesn’t exist anymore.”).
Include buttons to your homepage or portfolio.
Go to Settings → Advanced → 404 Page Not Found → select your custom page.
Common Mistakes to Avoid
❌ Forgetting to add redirects after slug changes.
❌ Creating redirect chains (instead of old → newest).
❌ Using 302 (temporary) redirects when 301 (permanent) is the correct choice.
❌ Leaving the default Squarespace 404 instead of customizing it.
Conclusion
Changing slugs is a normal part of improving your Squarespace site, but without proper redirects, you risk breaking links and losing traffic.
With simple 301 redirects and a user-friendly 404 page, you can protect your SEO value and keep visitors moving smoothly through your site.
👉 Want to see how redirects and clean slugs look in practice? Visit my Squarespace homepage or explore my portfolio. If you’d rather have everything set up correctly from the start, contact me here.
FAQ
-
301 = permanent (best for SEO). 302 = temporary. Stick with 301 in most cases.
-
Yes, if the old link was ever live or shared. Otherwise, visitors will hit a 404 page.
-
Not directly. But broken links reduce user trust and can waste link equity.
-
Yes. Just add multiple mappings:
/old-page -> /new-page 301
/old-page-2 -> /new-page 301